


Insulin is injected with a syringe or with a pre-filled pen. Syringes are the most cost-effective method.
With both methods, insulin is injected subcutaneously, which means it is applied into the layer of fat beneath the skin. It is slowly absorbed and imitates pancreatic production of this substance.
Insulin can also be administered through an insulin pump, which is a small electronic device that releases insulin over a period of 24 hours.
Types of injectable insulin
There are two ways that insulin can be injected:
1. Insulin with a syringe
There are many types of insulin syringes available, with syringe volumes varying from 0.3 to 2.0 ml. The right syringe to use depends on the dose of insulin to be injected.
Generally, each ml can be divided in 100 units, however there are insulins that contain 500 units in one ml. Therefore, unit calculations should be prescribed by a doctor based on blood sugar levels and insulin types.
Once you know your insulin dose, you should:
- Wash you hands, to avoid dirtying the insulin syringe and transporting bacteria to the syringe
- Screw the sterile needle onto the syringe, which should also be sterilized
- Disinfect the rubber top of the insulin bottle, by dipping a piece of cotton in alcohol and rubbing the top thoroughly.
- Insert the needle into the rubber top of the insulin bottle and turn the bottle upside down, making sure the needle remains within the fluid and does not draw-in air.
- Pull the plunger down until the syringe fills with the correct number of units. The barrel of the syringe will usually have marking indicating the volumes within the syringe.
- Remove the needle from the bottle, and apply a lid if needed.
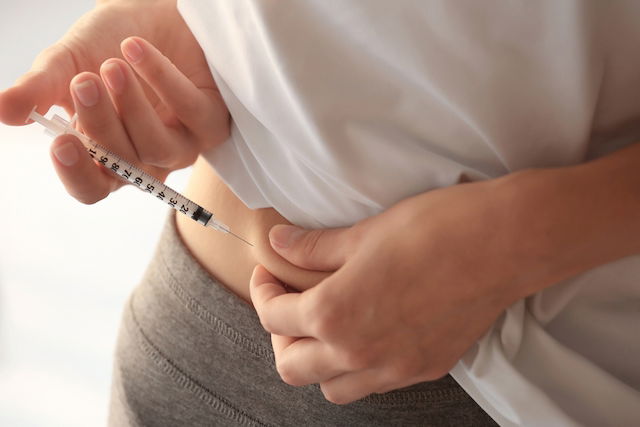
- Pinch the skin, between the thumb and index finger.
- Insert the needle completely in the pinched skin, at any angle of 45 to 90º, in a quick and firm pace.
- Push the plunger until all its contents have been released.
- Wait about 19 seconds, and remove the needle from the skin, releasing the pinched skin after removing the needle.
If mixing 2 types of insulin in the same syringe is necessary, you should first draw the fast-acting insulin and then add the slow-acting insulin. There is no need to switch needles. Normally, the fast-acting is clear, and the slow-acting is milky white. Be sure to shake both insulin bottles before drawing by rolling the bottles between two hands instead of shaking.
After inserting, the needle and syringe should be tossed in an appropriate recipient and then submitted to a pharmacy. If possible, cover the needle with its lid. You should not reuse any syringes or needles, as this can increase your risk for infection or reduce the medication action.
2. Insulin pen
An insulin pen is more practical than a syringe, although it is more costly. However, it may not be viable for all cases of diabetes,
To insert insulin correctly using a disposable a pen, you will need to:
- Wash your hands and the injection site. If the injection side is dirty, be sure to cleanse the area with a alcohol-soaked cotton ball or gauze.
- Get all your equipment together, which includes your insulin pen with the cartridge installed, the needle and a gauze square.
- Prepare your insulin dose by rotating the pen and observing the number in the dose window. If the doctor prescribed 4 units of insulin at dinner, for example, rotate the pen until you see the number 4.
- Pinch your skin, using your thumb or index finger. You should opt for your belly or inside of the thigh.
- Insert the needle at a 45 to 90º angle, using a rapid and firm motion. Because the needle is very small, you should try inserting at a larger angle (90º) if you are injecting into a higher body fat.
- Push the plunger or button until the end to inject the insulin.
- Wait 10 seconds before removing the needle so that the fluid can fully be absorbed into the body.
- Let go of the pinched skin.
Normally, injecting insulin does not cause any skin changes. Immediately after injecting, you may notice a drop of blood, which is not significant. This can be wiped away with a clean gauze or cotton ball.
Where to inject insulin
Insulin can be injected into the belly, inside of the thigh, back of the arm or the glutes. Normally, it is injected before a meal.
Injecting into the belly and thigh and be done by inserting the needle to pinched skin. To self-inject into the back of an arm, you do not need to pinch the skin, although this can be more complicated to accomplish alone.
You should rotate injection sites, as injections can lead to accumulated fat cells and flaccid skin (also referred to as lipodystrophy).
How to install a new cartridge in the pen
There are insulin pens that re disposable, which means that they can be tossed after you have used all the insulin inside of it. New cartridges are not installed in these pens, and the only preparation required is rotating the dose on the pen and pressing the button.
Most pens, however, do need new cartridges installed and can be used for many years. To install new cartridge, you should:
- Take the pen apart by unscrewing it.
- Remove the empty insulin cartridge and insert a new one inside the pen.
- Put the pen together by screwing it.
- Screw on a new needle to the pen tip.
- Test the pen by checking if a small drop comes out of the needle. This allows for air bubbles to be released.
After it is put together, the patient can use the pen until the cartridge runs out. You should switch your needle with each injection to prevent injury and injections.